LED Communication
As the RICOH THETA does not have a screen, your Android plug-in will need to use LEDs and sound as the primary way to communicate the status of your application to the user.
There are three variables you can control.
- Color of LED3
- Which LED
- LED blink rate
By varying the location, speed and color of the camera LEDs, you can communicate the status of your plug-in to the user.
In the the next example, we will blink LEDs 4, 5, 6, 7, and 8. We will not be controlling the color as only the color for LED3 can be controlled.
1 Edit MainActivity in Android Studio
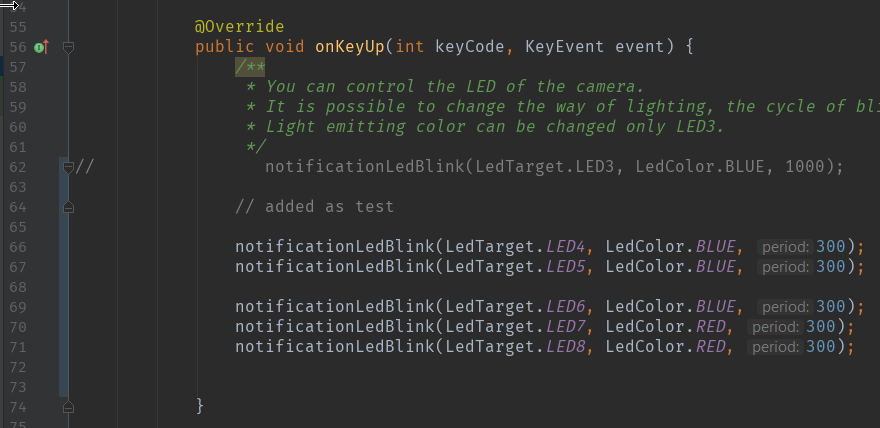
Go back to MainActivity. Comment out the line for LED3 and add the following lines to test the other
LEDs.
notificationLedBlink(LedTarget.LED4, LedColor.BLUE, 300);
notificationLedBlink(LedTarget.LED5, LedColor.BLUE, 300);

notificationLedBlink(LedTarget.LED6, LedColor.BLUE, 300);
notificationLedBlink(LedTarget.LED7, LedColor.RED, 300);
notificationLedBlink(LedTarget.LED8, LedColor.RED, 300);
2 Build, Install, Reboot
Follow the same process described in the section above.
- Build the apk from within Android Studio
- Find the location of the APK
- cd into that directory
- install the apk with
adb install -r app-debug.apk - reboot camera
3 Test
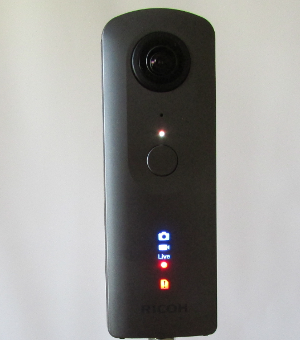
Press the lower mode button for longer than 2 seconds to put the camera into plug-in mode.
You should see all LEDs 4-8 blinking with a delay of 300ms between blinks.
Congratulations! You've just finished your second custom plug-in for the RICOH THETA V.