Camera Buttons Tutorial
In the next example, we'll control the buttons of the camera.
1 Inspect pluginlibrary
From inside of Android Studio, go back to pluginlibrary. It is part of the SDK.
Look for the KeyReceiver file.
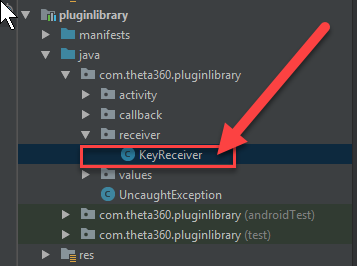
In the KeyReceiver subclass of BroadcastReceiver, you can see that the three usable buttons are defined as constants.
public class KeyReceiver extends BroadcastReceiver {
    public static final int KEYCODE_CAMERA = 27;
    public static final int KEYCODE_MEDIA_RECORD = 130;
    public static final int KEYCODE_WLAN_ON_OFF = 284;

    public static final String ACTION_KEY_DOWN = "com.theta360.plugin.ACTION_KEY_DOWN";
    public static final String ACTION_KEY_UP = "com.theta360.plugin.ACTION_KEY_UP";
    private static final String KEY_CODE = "keyCode";
    private static final String KEY_EVENT = "KeyEvent";
2 Locate buttons on camera
There are three buttons you can map:
| Button Common Name | Name in Library | Code | Location |
|---|---|---|---|
| WiFi | KEYCODE_WLAN_ON_OFF | 284 | side middle |
| Shutter | KEYCODE_MEDIA_RECORD | 130 | front |
| Mode | KEYCODE_CAMERA | 27 | side bottom |
Two of the buttons are on the side of the camera, below the power button. The third button is on the front of the camera. It is the big shutter button.
3 Open MainActivity
In Android Studio, go back to MainActivity and look for the onKeyDown method.
In MainActivity.java, there is an example of using the keyCode.
protected void onCreate(Bundle savedInstanceState) {
    super.onCreate(savedInstanceState);
    setContentView(R.layout.activity_main);

    // Set a callback when a button operation event is acquired.
    setKeyCallback(new KeyCallback() {
        @Override
        public void onKeyDown(int keyCode, KeyEvent event) {
            if (keyCode == KeyReceiver.KEYCODE_CAMERA) {
                /*
                 * To take a static picture, use the takePicture method.
                 * You can receive a fileUrl of the static picture in the callback.
                 */
                new TakePictureTask(mTakePictureTaskCallback).execute();
            }
        }
4 Map takePicture to Middle Side Button
As a simple test, we will map the middle side or wifi button to take a picture. If you forget the constant name, you can use Android Studio code completion to find it.

5 Build, install, test
Follow these steps:
- build the apk from inside of Android Studio
- install it with adb
- reboot camera
- put camera into plug-in mode
- test it on the camera by pressing the middle button on the side of the camera