This document is being created to replace the Unofficial Media Guide. At the time of writing, the THETA S is the newest model. If you’re looking for information in the previous media guide. It’s still here
Post comments and corrections to http://lists.theta360.guide in a public category or direct message @jcasman or @craig on the lists system. You must be logged in to send a message.
This is an unofficial, community-generated guide for developing applications that use 360 media from RICOH THETA cameras. This is not authorized by RICOH and is based on publicly available information.
Get the latest news and updates on Twitter @theta360dev
1. Resources
1.1. Official Information
1.2. Unofficial Information
2. Overview
This document focuses on still images and videos that are saved to the internal storage of the camera and transferred to a mobile phone, computer, or device such as the Sony PlayStation VR. For information on streaming 360 video from the THETA, see the Live Streaming Guide.
The video is a standard MP4 file. The image is a standard JPEG file. You can use tools like Photoshop, Premiere Pro, Paint to edit both the images and the videos.
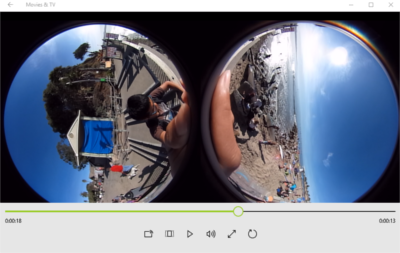
The THETA has two lenses. Each lens captures half of a spheres. The two spheres are placed side by side on media internal to the camera. This image or video is referred to as dual-fisheye.
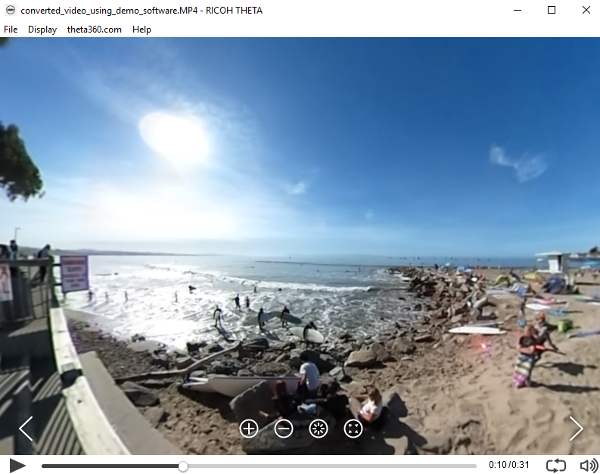
Normally, you won’t see or deal with media in dual-fisheye format. You will usually deal with media in equirectangular format.
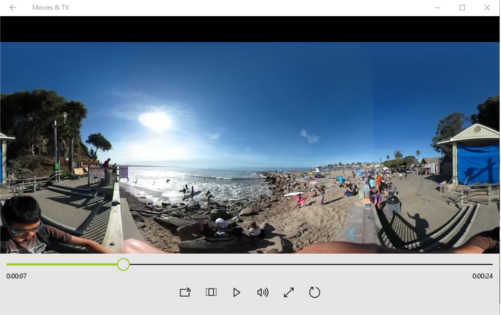
360 players, such as the RICOH player, YouTube, Facebook, or a VR headset will take media in equirectangular format and enable navigation.
3. Resize
You can resize your image as long as it is in ratio of 2:1.
In the example below, I’m using the Linux utility to ImageMagick to resize the image to a low resolution of 800x400.
$ convert original.jpg -resize 800x400 resized.jpg
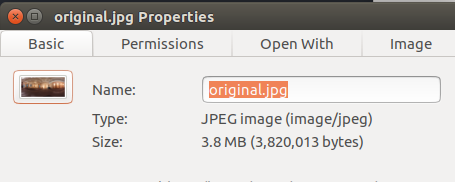
I’ll verify that the file size was reduced from 3.8M to 0.2M.
$ ll
-rw-r--r-- 1 craig craig 3820013 Oct 23  2016 original.jpg
-rw-r--r-- 1 craig craig  205001 Jun  1 13:51 resized.jpg
$
In the example above, I’ve aliased ls -l to ll.
|
Navigation works in the resized image.

I’m using exiftool to verify the dimensions of the file.
$ exiftool resized.jpg |grep 'Image Size'
Image Size                      : 800x400
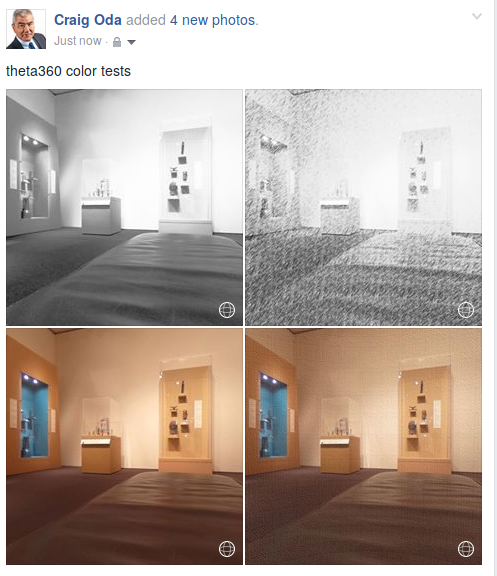
4. Color
You can apply color transformations to the THETA image and retain the 360 features.
In this example, I’m using ImageMagick from the command line to change the image into a black and white 360 image.
$ convert original.jpg -colorspace Gray -emboss 0x.5 gray.jpg
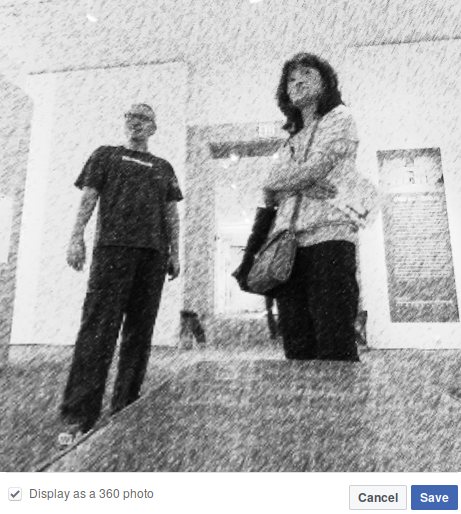
This example shows a command line sketch transformation applied to the 360 image.
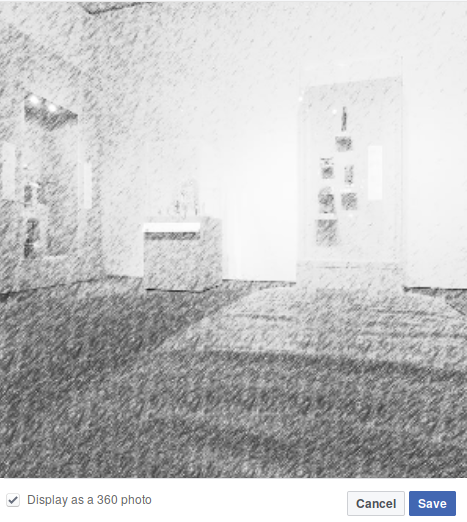
The actual command is somewhat complex, but you can just copy the command and replace the file name.
First make a pencil tile. You just need to do this once to generate a small tile for the pencil.
convert -size 256x256 xc: +noise Random -virtual-pixel tile -motion-blur 0x20+135 -charcoal 1 -resize 50% pencil_tile.gif
Then apply the command below.
convert original.jpg -colorspace gray \( +clone -tile pencil_tile.gif -draw "color 0,0 reset" +clone +swap -compose color_dodge -composite \) -fx 'u*.2+v*.8' sketch.jpg
In this example, I’m applying a photo texture with this graphic.

The resized image retains 360 navigation.
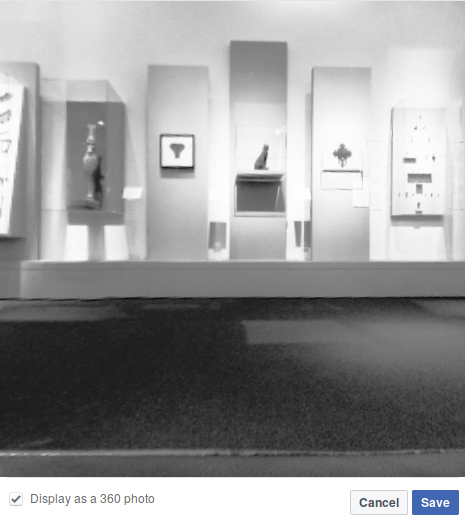
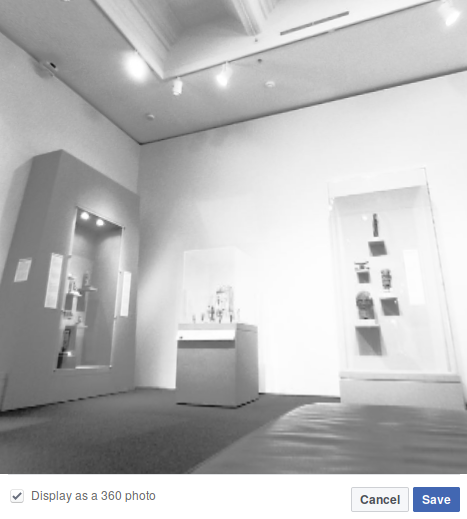
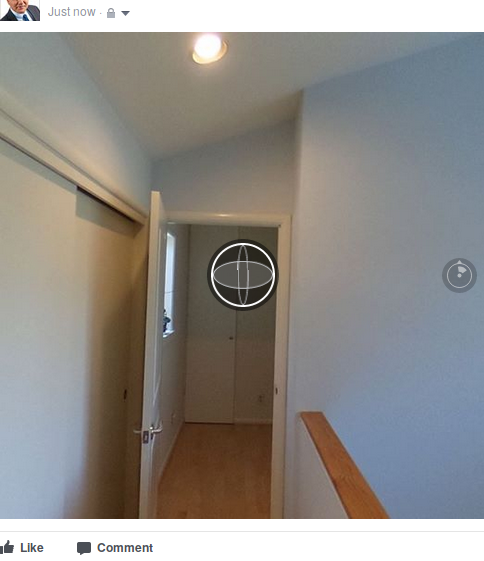
Here’s what the images look like on Facebook.
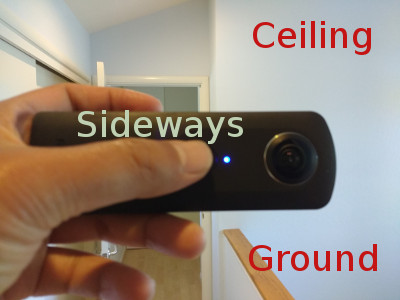
5. Orientation and Tilt
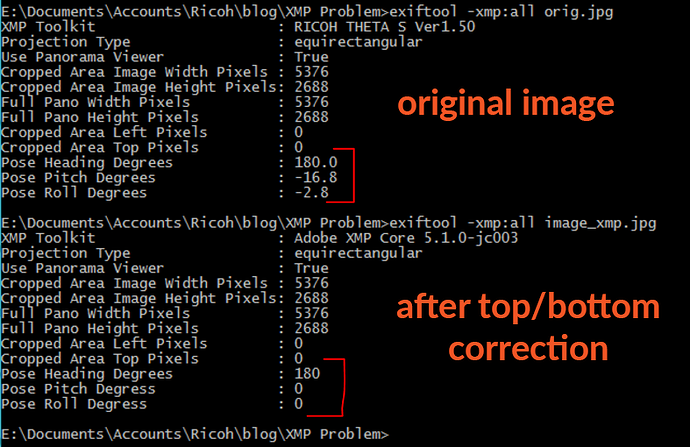
The THETA camera contains a gyroscope and compass to determine the position of the camera. The camera orientation is saved as metadata into the image.
Examining the XMP data with exiftool shows the pitch and roll.
$ exiftool filename.jpg
Pose Pitch Degrees              : -12.1
Pose Roll Degrees               : 92.4
When I upload the image to Facebook, the Facebook application reads in the XMP data and automatically puts the image in the proper orientation.
If your application does not automatically adjust the image orientation based on the camera orientation, you may want to edit the orientation manually. I’ll cover two examples. Povray and Hugin.
By rolling the x axis back by -92.4 degrees, I can display the image upright.
By using Povray, I’ve deleted my XMP data and have lost 360 navigation.
If I set ProjectionType to equirectangular, the image will regain 360 navigation on Facebook.
$ exiftool -ProjectionType=equirectangular sidewaysCorrected.jpg
    1 image files updated
I noticed that povray also flipped my image horizontally. I’m going to flip it back.
$ convert -flop sidewaysCorrected.jpg flipped.jpg
I’m now going to confirm that the XMP data was retained.
$ exiftool flipped.jpg |grep Projection
Projection Type                 : equirectangular
Now that you have the basics of XMP data and pitch and roll orientation data, let’s have some fun with povray.
5.1. Povray
This shows image adjustment by wrapping the THETA equirectangular image around a sphere in Povray and then rotating the sphere.
| This will delete your XMP data and you may lose 360 navigation. You may need to inject the ProjectionType metadata back into your image. |
Povray is a command line tool that is intended to be used within a bash script. Alternately, if you’re writing your own application, it may help you to understand the concept of rotating a sphere to make the proper image adjustment.
Povray reads in a configuration file. The file below specifies a spherical camera and a texture for the sphere that is an equirectangular image.
5.1.1. .pov configuration file
#include "colors.inc"
#include "shapes.inc"
camera {
spherical
}
sphere {
  // center of sphere
  <0,0,0>, 1
  texture {
    pigment {
      image_map {
        jpeg "museum.jpg"
        interpolate 2
        once
        map_type 1
    }
   }
   rotate z * 90
   // rotate x * 90
   finish { ambient 1}
}
}
5.1.2. command line
The configuration file above is used by povray on the command line to output a new file.
$ povray +W5376 +H2688 +fj thetasphere.pov +Othetaspherez90.jpg
| Depending on your application, you may need to inject metadata tags back into the image that you output with povray. At a minium, you should set ProjectionType to equirectangular. |
5.2. Hugin
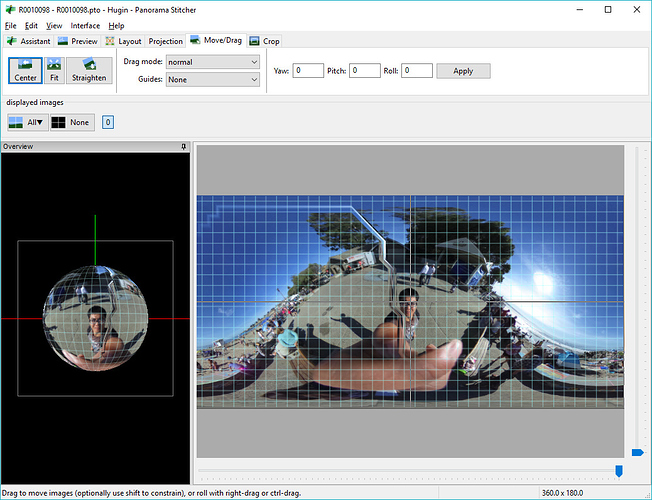
There are many ways to fix the tilt of a 360 image. Photoshop can adjust orientation with offset adjustment. Affinity Photo is also popular. If your viewer supports XMP data, you can edit the metadata. For example, in Facebook and most social media applications, simply drag the default orientation with your mouse.
I will show you a technique to use Hugin. It’s not necessarily a best practice as it’s a bit cumbersome. However, this technique may have a place in your toolbox if your viewer does not support XMP data. This technique works with any application, even applications that do not support pitch, yaw, and roll adjustments with XMP data.
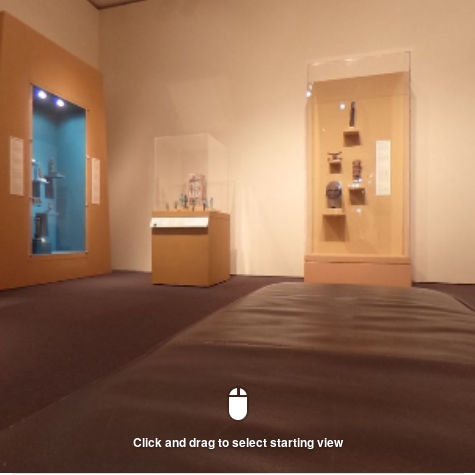
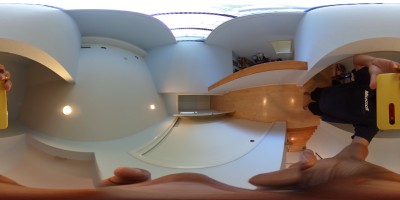
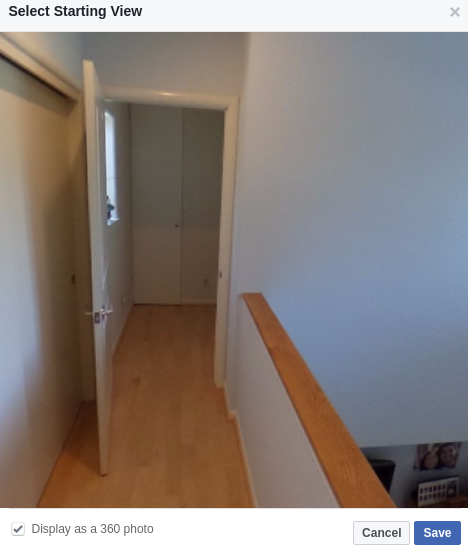
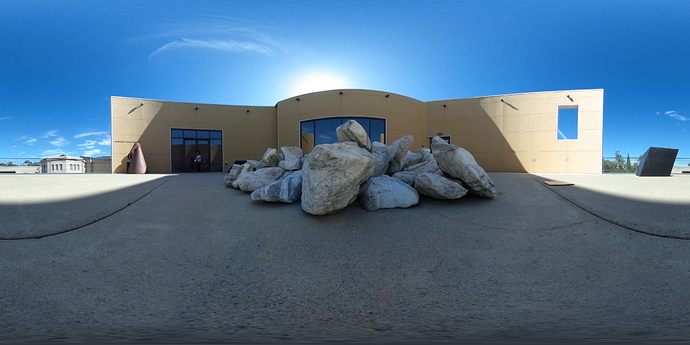
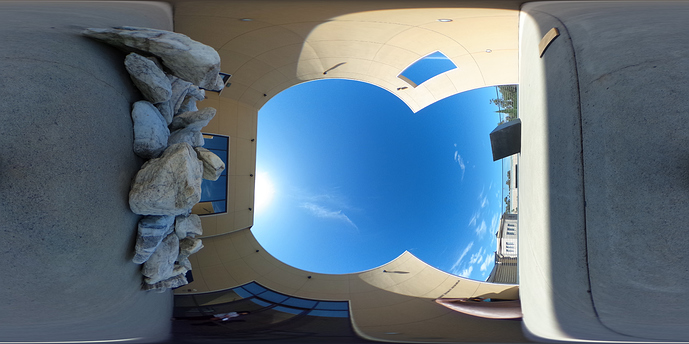
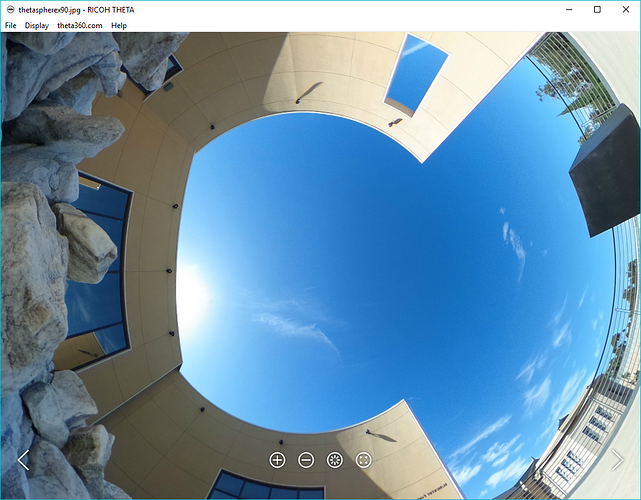
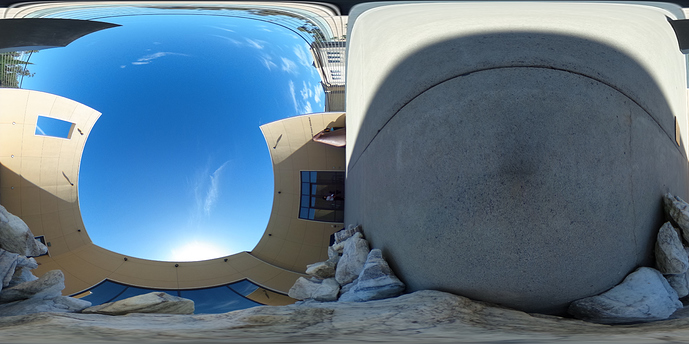
5.2.1. Starting position of THETA image before editing
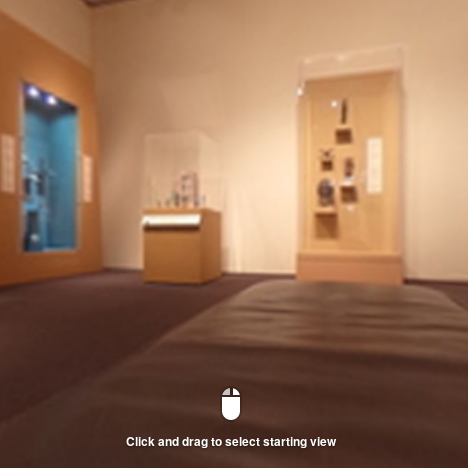
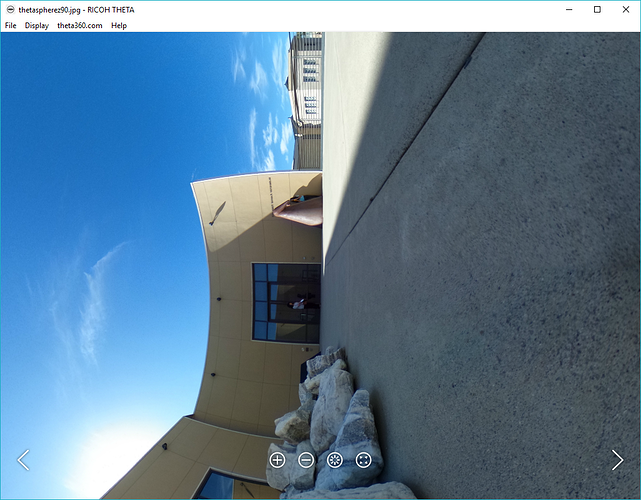
5.2.2. Starting position of THETA image after editing
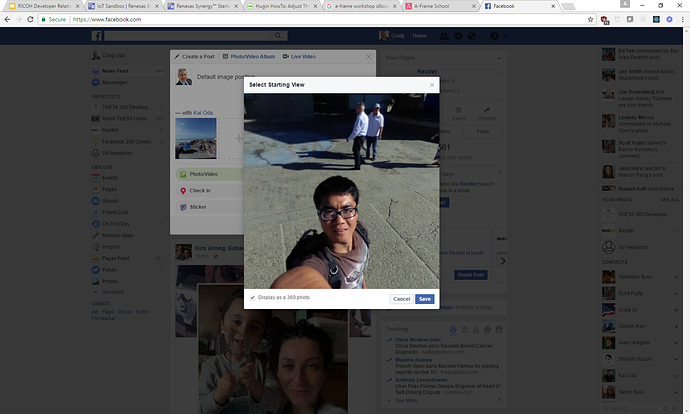
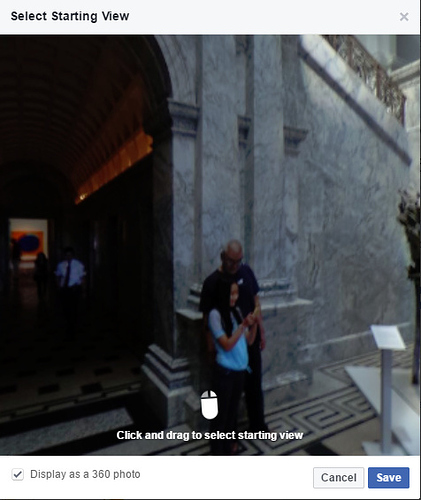
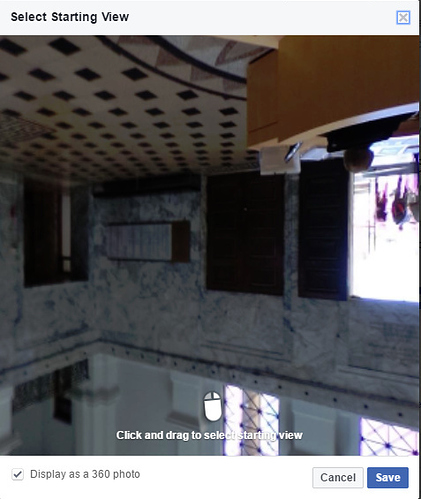
5.2.3. Facebook Starting Position
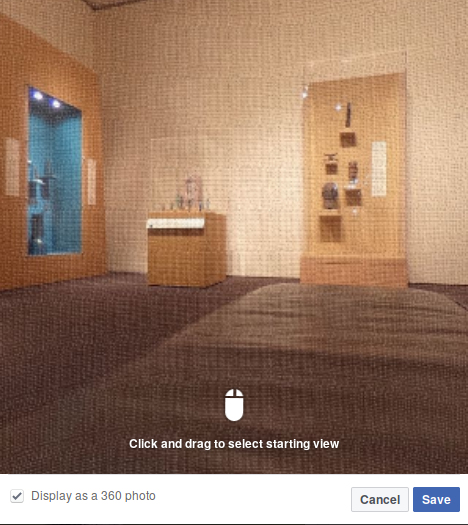
To save you time, I’ll repeat that you don’t need this technique if your application is uploading a 360 image to Facebook or most social media sites. Facebook adjusts the XMP data using your mouse to set the default image.
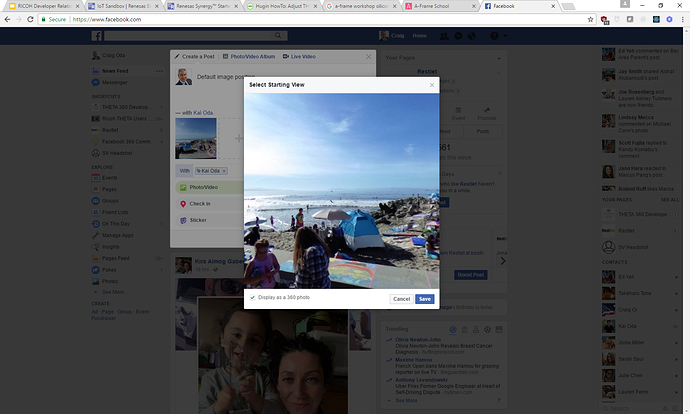
5.2.4. Social Media Apps Have Easy Mouse Adjustment
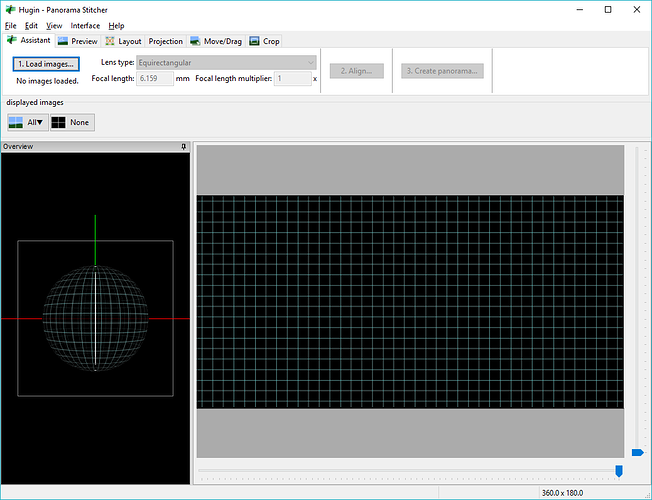
5.2.5. Start Hugin
5.2.6. Drag THETA Image Onto Sphere

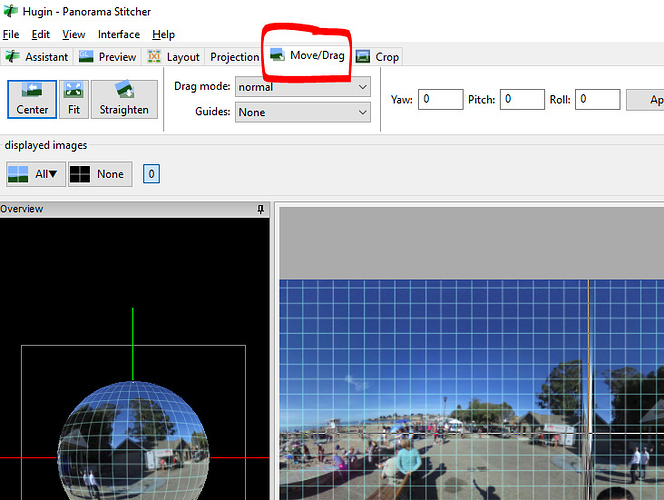
5.2.7. Switch to Move/Drag View
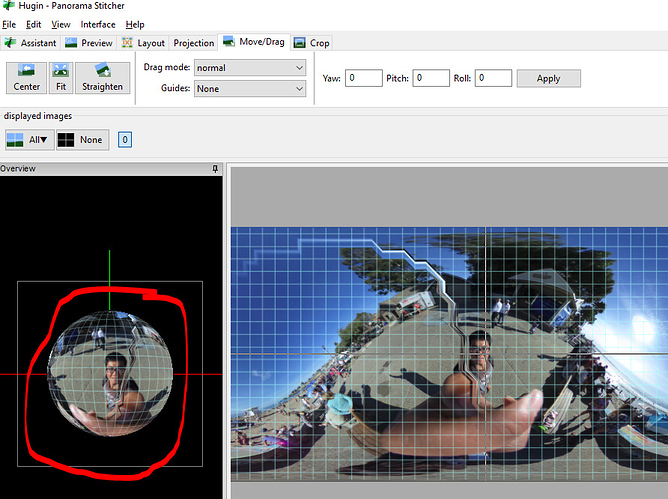
5.2.8. Left Mouse On Sphere
5.2.9. Change Default Image Format to JPEG

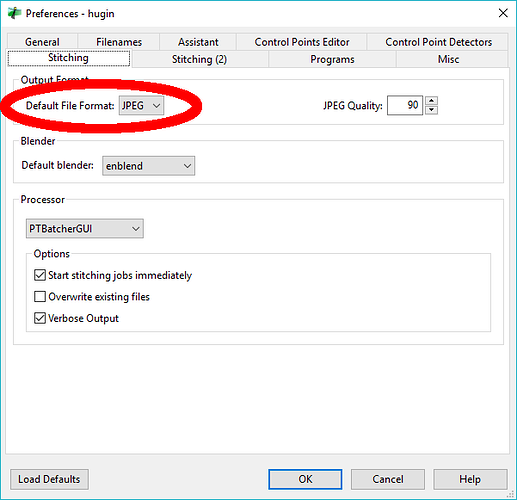
| The THETA application can only read in JPEG format files. |
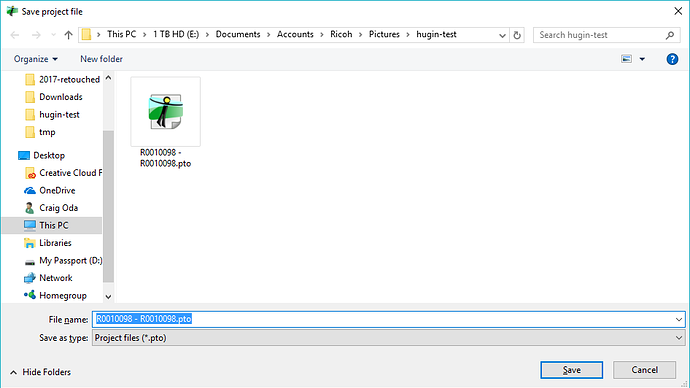
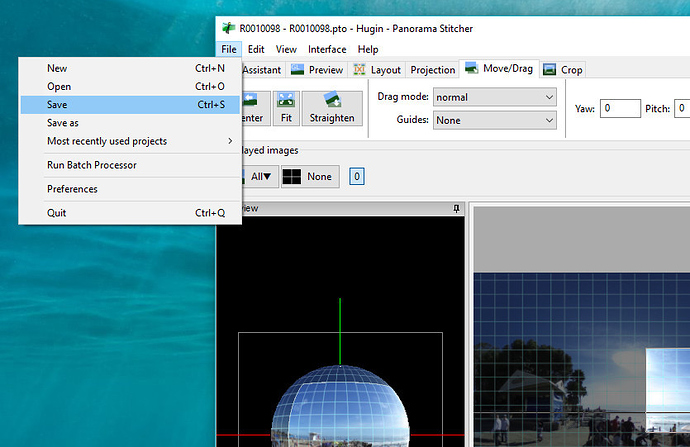
5.2.10. Save Hugin as *.pto file
5.2.11. Select Batch Processing Tool
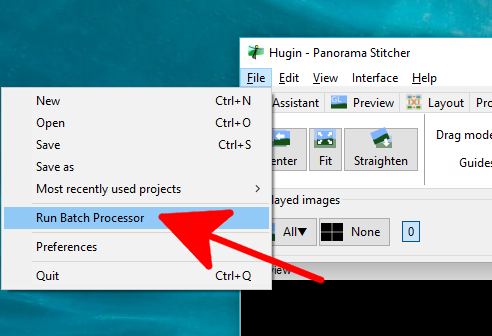
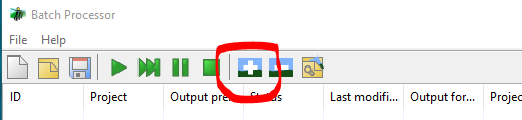
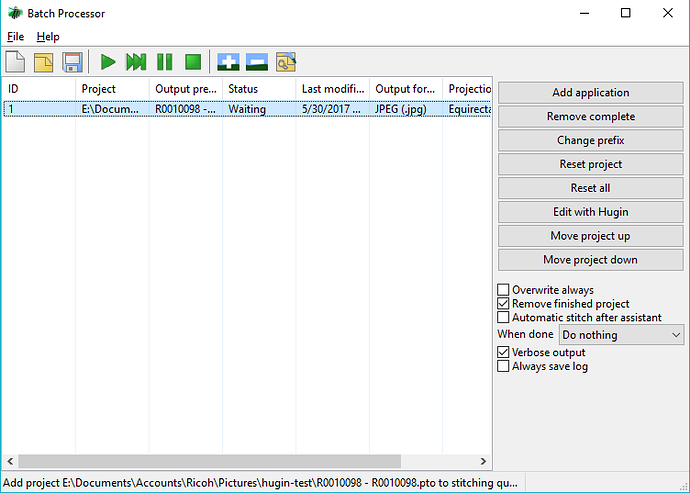
5.2.12. Select + sign to select Hugin project
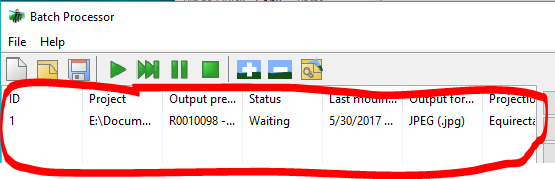
5.2.13. Add Hugin Project File
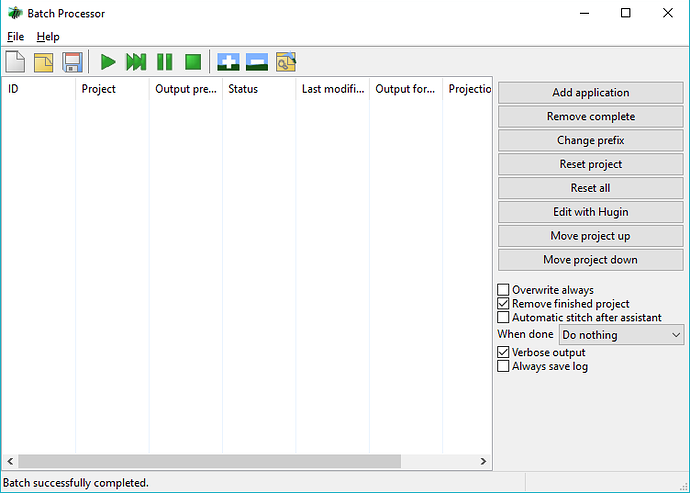
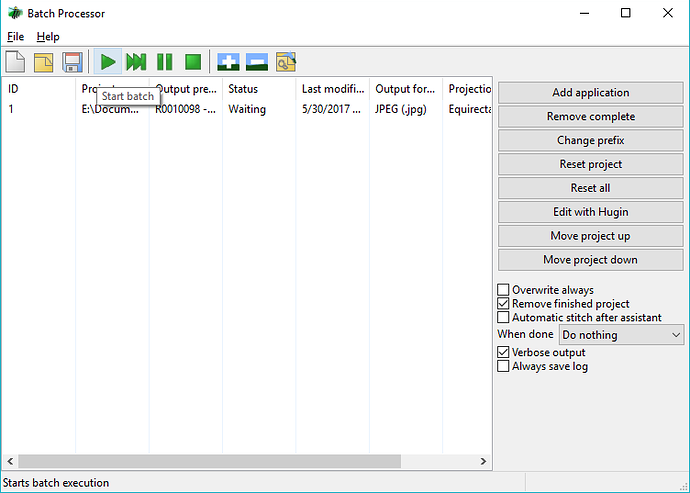
5.2.14. Press Play to Start Batch
5.2.15. Edited Image File Saved to Disk
6. Crop
Although there are better techniques to get a crop such as using Affinity Photo, This technique is useful for a quick crop.
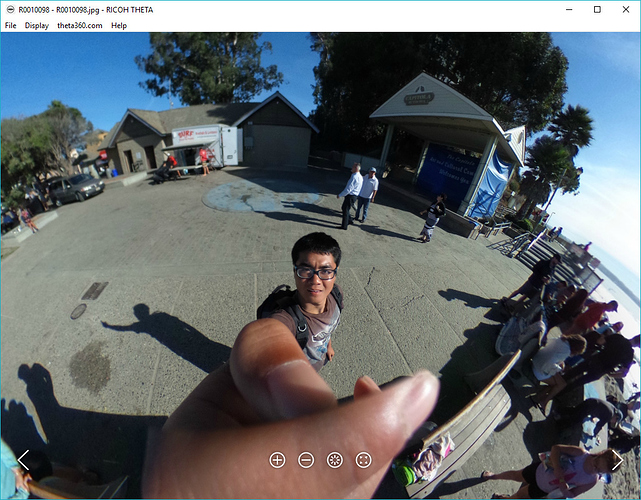
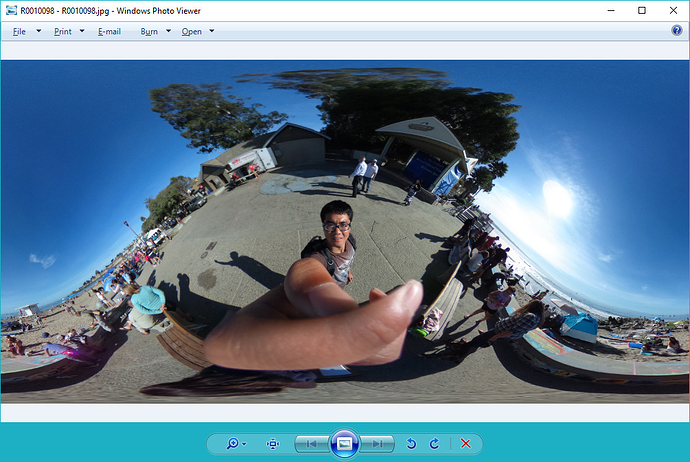
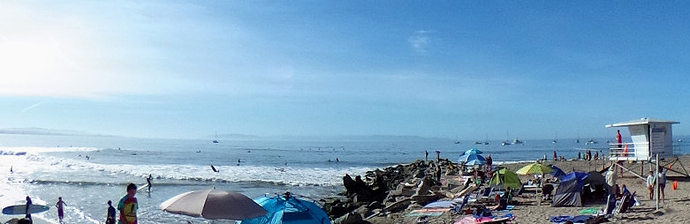
6.1. Original Image Showing Person in Selfie Style
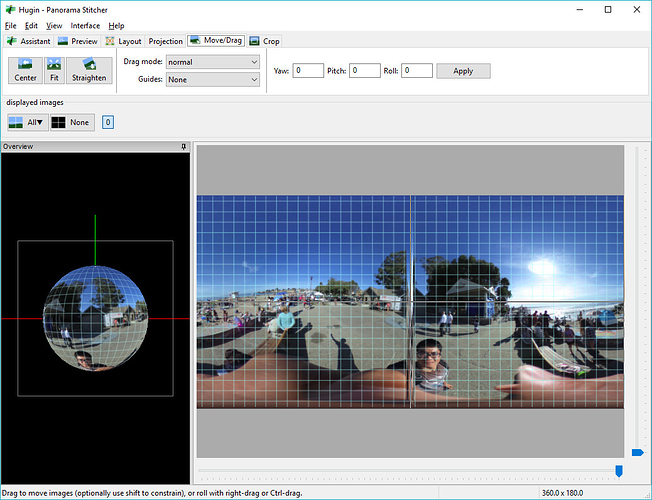
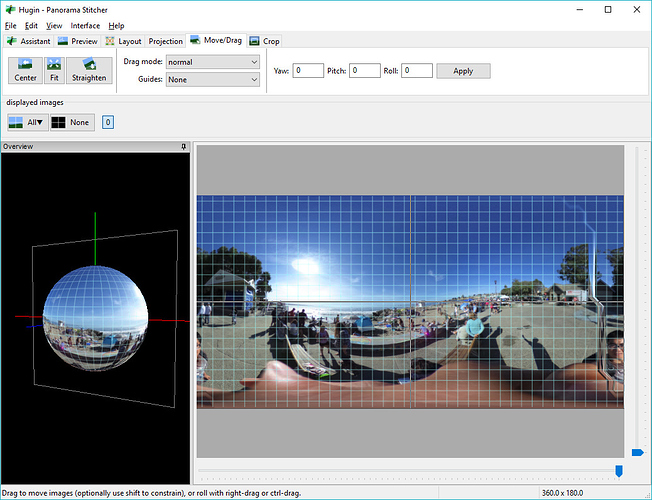
6.2. Use Move/Drag to View Side Scenery
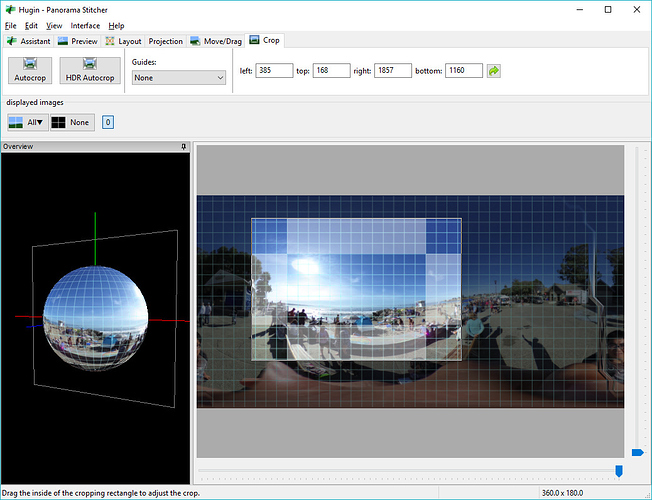
6.3. Crop Scene
6.4. Save as Flat JPEG File
6.5. Details of Steps
6.5.1. Save Hugin Project File
6.5.2. Start Batch Processor

6.5.3. Load Project File
6.5.4. Run Batch
6.6. Example Crops From Same image
You can rapidly crop multiple signs out that are the same size. This is a fairly quick technique to produce many crops quickly just by rotating the sphere and saving the new project file. All three of these images are made in a few minutes with the crop technique. It might be useful for surveillance, construction, or even social media if you reduce the width.
7. metadata
7.1. What is Metadata?
360 images have hidden text embedded into the image data. This data is called metadata. It is not designed for humans. A computer reads in the metadata.
Photo Sphere XMP Metadata is a Google standard taken from the Adobe XMP standard. You can edit this data with an image editor or a text editor. Most 360 image viewers such as Facebook will support XMP data. As 360 images are still new, not all applications support XMP data. If the application does not support XMP data, you will need to edit the entire image with something link Hugin or Photoshop.
7.2. Why Use XMP Data?
Editing the XMP data uses less CPU and memory resources. Your application can change the text string for orientation with almost no delay for the user of your application. Editing the entire image orientation with image editing techniques is going to place a heavy load on the mobile or desktop application.
7.3. What Can You Edit?
You can edit both the XMP data embedded in the THETA image as well as add new XMP data tags that comply to the Photo Sphere XMP Metadata standard. For example, your application can add GPS data as well as initial view data to the image. The data can then be used by 360 viewing applications such as Facebook.
7.4. Overview of Functionality using Facebook as Viewer
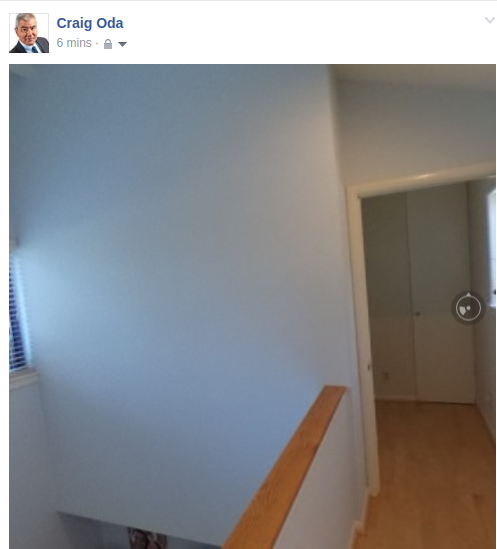
This is the same image shown on Facebook with no mouse editing. The orientation was changed by only using XMP data strings.
7.4.1. Default View of Image Before Editing
The original image looks like this on Facebook with no editing. Although Facebook allows you to set the orientation with their Facebook app, let’s imagine that you’re building a better Facebook or building a new application to support XMP data. Imagine that the mouse is not there.
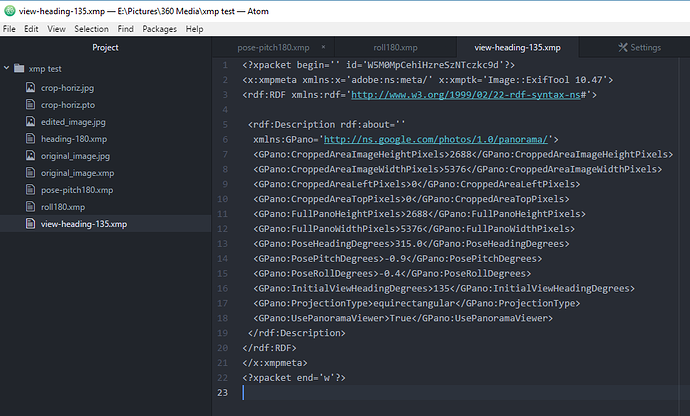
This is the default XMP data that we’ll edit for our tests.
<GPano:PosePitchDegrees>-0.9</GPano:PosePitchDegrees>
<GPano:PoseRollDegrees>-0.4</GPano:PoseRollDegrees>
7.4.2. Pose Pitch Increased by 180 Degrees
Here, I’ll increase the PosePitchDegrees by 180 degrees to illustrate the orientation change. Image the camera is upside and you need to correct the image orientation.
<GPano:PosePitchDegrees>179.1</GPano:PosePitchDegrees>
<GPano:PoseRollDegrees>-0.4</GPano:PoseRollDegrees>
7.4.3. Pose Roll Increased by 180 Degrees
In the next example, I’ve increased the Roll by 180 and reset the Pitch to the default value. image::img/metadata/roll180.jpg[role="thumb" title="roll rotated 180 degrees"]
<GPano:PosePitchDegrees>-0.9</GPano:PosePitchDegrees>
<GPano:PoseRollDegrees>179.6</GPano:PoseRollDegrees>
7.4.4. InitialViewHeadingDegrees Decreased by 180
In the next example, I’ve added a new metadata tag for InitialViewHeadingDegrees. I got the name of the tag from the XMP standard. I’ve rotated the orientation by 180 degrees to show the back of the image sphere.
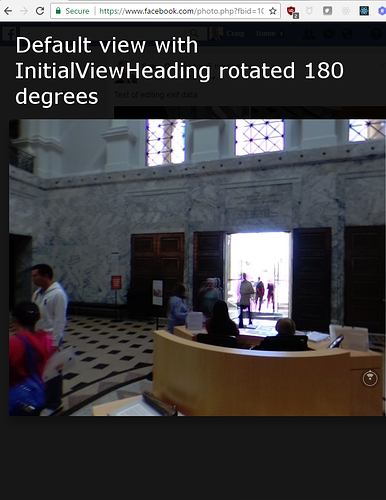
<GPano:PosePitchDegrees>-0.9</GPano:PosePitchDegrees>
<GPano:PoseRollDegrees>-0.4</GPano:PoseRollDegrees>
<GPano:InitialViewHeadingDegrees>135</GPano:InitialViewHeadingDegrees>
7.5. Metadata Tools
There are a number of free tools and libraries to access the metadata.
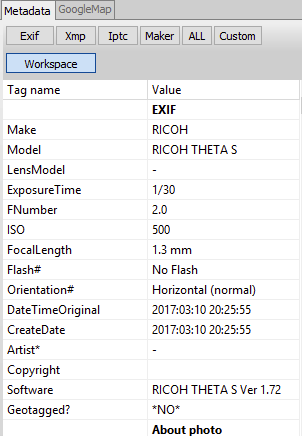
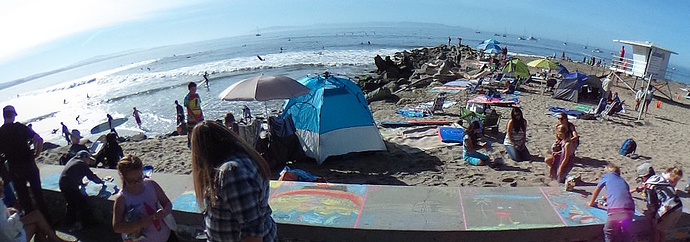
You can immediately see useful data in the metadata tags. Many sites, including Facebook will look for a Make of RICOH and a Model of RICOH THETA S. You can use the metadata Make and Model to see if the image file your application is opening is a 360 image.
| The THETA image must also be in a ratio of 2:1. Your application should check for this ratio in case the image was edited incorrectly in post-processing. |
Clicking on the Xmp tab, we’ll now get to the real exciting data.

For starters, you can check for the ProjectionType of equirectangular. Your application can easily identify an equirectangular image this way.
Below this, you can see the PoseHeadingDegrees, PosePitchDegrees, and PoseRollDegrees. The THETA camera has internal sensors to get the heading, pitch and roll.
| The user of your application may have edited the image and deleted the metadata from the image. The solution is to review their post-processing workflow and then inspect the metadata manually or your application can check it. |
Metadata can be injected into a 360 image that has lost the data by graphic editing tools. Programming libraries can do this, or you can use exiftool in a script.
exiftool -ProjectionType="equirectangular" photo.jpg
Here’s an article on getting the images to work after resizing the image by copying the original XMP data and copying over the resized image.
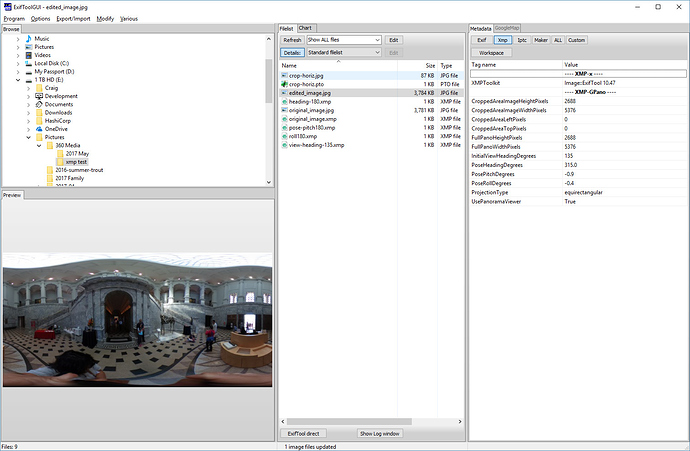
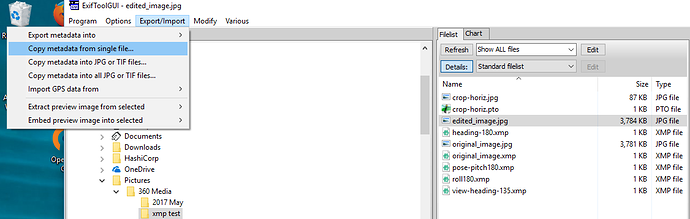
7.6. Edit XMP Data In Text File
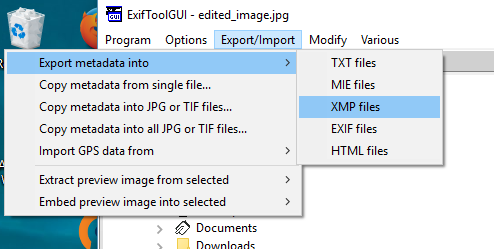
Import XMP data into THETA image. With the THETA image you want to edit selected, copy metadata from single file.
7.7. Exiftool from command line
You can read and edit the XMP data directly from the command line. In the examples below, I’m using a bash shell on Windows. Many people use a bash script to control exiftool
7.7.1. Reading Data
$ ./exiftool.exe edited_image.jpg > data.txt
$ less data.txt
This is the metadata in my data.txt file
ExifTool Version Number         : 10.47
File Name                       : edited_image.jpg
Directory                       : .
File Size                       : 3.7 MB
File Modification Date/Time     : 2017:05:31 12:44:39-07:00
File Access Date/Time           : 2017:05:31 12:44:39-07:00
File Creation Date/Time         : 2017:05:31 11:31:21-07:00
File Permissions                : rw-rw-rw-
File Type                       : JPEG
File Type Extension             : jpg
MIME Type                       : image/jpeg
Exif Byte Order                 : Big-endian (Motorola, MM)
Image Description               :
Make                            : RICOH
Camera Model Name               : RICOH THETA S
Orientation                     : Horizontal (normal)
X Resolution                    : 72
Y Resolution                    : 72
Resolution Unit                 : inches
Software                        : RICOH THETA S Ver 1.62
Modify Date                     : 2016:10:23 12:25:33
Y Cb Cr Positioning             : Co-sited
Copyright                       :
Exposure Time                   : 1/125
F Number                        : 2.0
ISO                             : 100
Sensitivity Type                : Standard Output Sensitivity
Exif Version                    : 0230
Date/Time Original              : 2016:10:23 12:25:33
Create Date                     : 2016:10:23 12:25:33
Components Configuration        : Y, Cb, Cr, -
Compressed Bits Per Pixel       : 3.2
Aperture Value                  : 2.0
Brightness Value                : 3.5
Exposure Compensation           : -0.7
Max Aperture Value              : 2.0
Metering Mode                   : Multi-segment
Light Source                    : Unknown
Flash                           : No Flash
Focal Length                    : 1.3 mm
Maker Note Type                 : Rdc
Firmware Version                : 1.62
Serial Number                   : (00000000)00010093
Recording Format                : JPEG
Accelerometer                   : 359.6 -0.9
Compass                         : 315
Time Zone                       : -07:00
Exposure Program                : Auto
White Balance                   : Auto
User Comment                    :
Flashpix Version                : 0100
Color Space                     : sRGB
Exif Image Width                : 5376
Exif Image Height               : 2688
Interoperability Index          : R98 - DCF basic file (sRGB)
Interoperability Version        : 0100
Exposure Mode                   : Auto
Scene Capture Type              : Standard
Sharpness                       : Normal
GPS Version ID                  : 2.3.0.0
GPS Latitude Ref                : North
GPS Longitude Ref               : West
GPS Altitude Ref                : Above Sea Level
GPS Time Stamp                  : 19:25:31
GPS Img Direction Ref           : True North
GPS Img Direction               : 315
GPS Map Datum                   : WGS84
GPS Date Stamp                  : 2016:10:23
Compression                     : JPEG (old-style)
Thumbnail Offset                : 58496
Thumbnail Length                : 3118
XMP Toolkit                     : Image::ExifTool 10.47
Cropped Area Image Height Pixels: 2688
Cropped Area Image Width Pixels : 5376
Cropped Area Left Pixels        : 0
Cropped Area Top Pixels         : 0
Full Pano Height Pixels         : 2688
Full Pano Width Pixels          : 5376
Initial View Heading Degrees    : 135
Pose Heading Degrees            : 315.0
Pose Pitch Degrees              : -0.9
Pose Roll Degrees               : -0.4
Projection Type                 : equirectangular
Use Panorama Viewer             : True
Image Width                     : 5376
Image Height                    : 2688
Encoding Process                : Baseline DCT, Huffman coding
Bits Per Sample                 : 8
Color Components                : 3
Y Cb Cr Sub Sampling            : YCbCr4:2:2 (2 1)
Aperture                        : 2.0
GPS Altitude                    : 36 m Above Sea Level
GPS Date/Time                   : 2016:10:23 19:25:31Z
GPS Latitude                    : 37 deg 25' 58.58" N
GPS Longitude                   : 122 deg 10' 14.32" W
GPS Position                    : 37 deg 25' 58.58" N, 122 deg 10' 14.32" W
Image Size                      : 5376x2688
Megapixels                      : 14.5
Ricoh Pitch                     : -0.9
Ricoh Roll                      : -0.399999999999977
Shutter Speed                   : 1/125
Thumbnail Image                 : (Binary data 3118 bytes, use -b option to extract)
Focal Length                    : 1.3 mm
Light Value                     : 9.0
7.8. Writing Data
$ ./exiftool.exe -InitialViewHeadingDegrees=45 edited_image.jpg
    1 image files updated
7.9. Grab XMP Data with Node
7.9.1. Script
  1
2
3
4
5
6
7
8
9
10
11
12
13
14
15
16
17
18
19

    var im = require('imagemagick');
  var filename = process.argv.slice(2)[0];

  if (filename === undefined) {
    console.log('\n    usage: node nodeMagick.js image\n');
  } else {

  console.log(filename);
  im.identify(filename, function(err, metadata) {
    if (err) throw err;
    var filtered = {}
    var data = metadata.properties
    for (key in data) {
      if (key.match(/^gpano/)) filtered[key] = data[key];
    }
    console.log(filtered);
  })

}
7.9.2. Output
$ node nodeMagick.js original.jpg
{ 'gpano:croppedareaimageheightpixels': '2688',
  'gpano:croppedareaimagewidthpixels': '5376',
  'gpano:croppedarealeftpixels': '0',
  'gpano:croppedareatoppixels': '0',
  'gpano:fullpanoheightpixels': '2688',
  'gpano:fullpanowidthpixels': '5376',
  'gpano:poseheadingdegrees': '180.0',
  'gpano:posepitchdegrees': '2.8',
  'gpano:poserolldegrees': '-0.3',
  'gpano:projectiontype': 'equirectangular',
  'gpano:usepanoramaviewer': 'True' }
7.10. Zero Out XMP Data with THETA Desktop Application
The THETA desktop application can be used to zero out the pitch and roll so that your image editing application does not get confused. Problems occur when the entire image is edited with an image editor and then an application like Google Street View applies the XMP pitch and roll correction on top of the editing.
After the correction, the XMP data for pitch and roll will be zeroed out.
| The orientation of images on an application like Google Streetview will be incorrect if the user applied correction to some images and not others. They need to apply the adjustment to all images. |
7.11. Libraries
-
easyexif: C++ EXIF parsing library by Mayank Lahiri
-
Exiv2: C++ metadata library and tools by Andreas Huggel
-
ExifLib - A fast EXIF data extractor for .NET by Simon McKenzie
7.12. End User Tools
These tools are for digital artists and support the XMP tags. Many other tools support the metadata tags.
-
Flexify 2 Photoshop plug-in
8. Sample Application
The sample application theta_rectify and post were contributed to the community by Dr. Koen Hufkens of Harvard University.
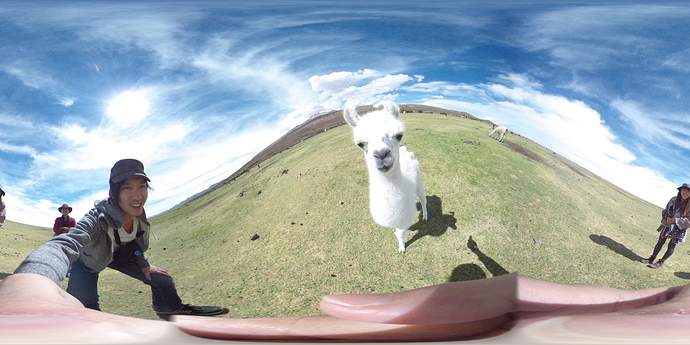
My Virtual Forest project is still running strong and generates tons of spherical images (currently ~50GB). However, the post on which the camera sits is not perfectly level. The Theta S camera normally compensates for this using an internal gyroscope which detects pitch and roll of the camera. Yet, when downloading images directly from the camera no adjustments are made and the pitch and roll data is merely recorded in the EXIF data of the image.
As such I wrote a small bash script which rectifies (levels the horizon) in Theta S spherical images using this internal EXIF data. This is an alternative implementation to the THETA EXIF Library by Regen. I use his cute Lama test images for reference. All credit for the funky images go to Regen. Below is the quick install guide to using my script. I hope it helps speed up people’s Theta S workflow.
8.1. Install
Download, fork or copy paste the script from my github repository to your machine and make it executable.
$ chmod +x theta_rectify.sh
8.2. Use
$ theta_rectify.sh image.jpg
The above command will rectify the image.jpg file and output a new file called image_rectified.jpg.
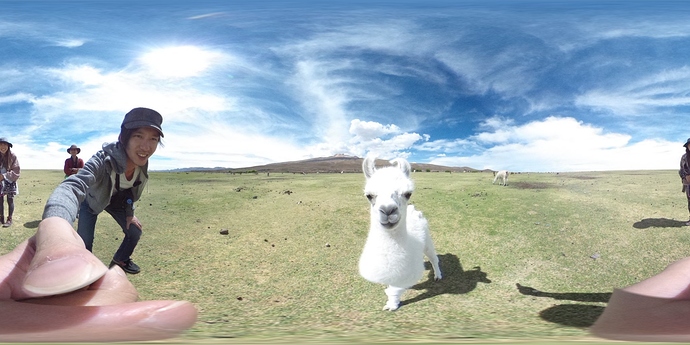
Visual comparison between my results and those of Regen’s python script show good correspondence.
8.3. Requirements
The script depends on a running copy of exiftools, imagemagick and POVRay. These tools are commonly available in most Linux distros, and can be installed on OSX using tools such as homebrew. I lack a MS Windows system, but the script should be easily adjusted to cover similar functionality.
8.4. Code
  1
2
3
4
5
6
7
8
9
10
11
12
13
14
15
16
17
18
19
20
21
22
23
24
25
26
27
28
29
30
31
32
33
34
35
36
37
38
39
40
41
42
43
44
45
46
47
48
49
50
51
52
53
54
55
56
57
58
59
60
61
62
63
64

    #!/bin/bash
  #
  # Automatically levels Theta S spherical images
  # depends on exiftools / imagemagick and POVRay
  # Should work on most Linux installs and on
  # OSX using homebrew installs or similar

  # get the filename without the extension
  noextension=`echo $1 | sed 's/\(.*\)\..*/\1/'`

  # grab the width and height of the images
  height=`exiftool $1 | grep "^Image Height" | cut -d':' -f2 | sed 's/ //g'`
  width=`exiftool $1 | grep "^Image Width" | cut -d':' -f2 | sed 's/ //g'`

  # grab pitch roll
  roll=`exiftool $1 | grep "Roll" | cut -d':' -f2 | sed 's/ //g'`
  pitch=`exiftool $1 | grep "Pitch" | cut -d':' -f2 | sed 's/ //g'`
  pitch=$(bc <<< "$pitch * -1")

  # flip the image horizontally
  convert -flop $1 tmp.jpg

  # create povray script with correct image parameters
  cat <<EOF > tmp.pov
  // Equirectangular Panorama Render
  // bare bones script
  // camera settings
  camera {
    spherical // equirectangular projection
    up    y * 1
    right  x * image_width / image_height
    location <0,0,0>     // put camera at origin
    angle 360 180        // full image
    rotate x * 0         // Tilt up (+) or down (-)
    rotate y * -90         // Look left (+) or right (-)
    rotate z * 0         // Rotate CCW (+) or CW (-)
  }
  // create a sphere shape
  sphere {
    // center of sphere
    <0,0,0>, 1
    texture {
      pigment {
        image_map {
          jpeg "tmp.jpg"
          interpolate 2 // smooth it
          once   // don't tile image, just one copy
          map_type 1
        }
      }
      rotate x * $roll   //Tilt up (+) or down (-) or PITCH
      rotate y * 0       //shift left (+) or right (-)
      rotate z * $pitch  //Rotate CCW (+) or CW (-) or ROLL
      finish { ambient 1 }
    }
  }
  EOF

  # execute povray script and rename file
  povray +W$width +H$height -D +fj tmp.pov +O${noextension}_rectified.jpg

  # remove temporary files / clean up
  rm tmp.jpg
  rm tmp.pov
8.5. Explanation
This section added by Craig.
exiftool pulls the orientation from the XMP data. To get the Roll, grep for the Roll.
$ exiftool original.jpg |grep Roll
Pose Roll Degrees               : -0.3
Ricoh Roll                      : -0.300000000000011
Same for pitch.
$ exiftool original.jpg |grep "Pitch"
Pose Pitch Degrees              : 2.8
Ricoh Pitch                     : 2.8
This line uses ImageMagick to flip the image horizontally.
convert -flop $1 tmp.jpg
In this section, Koen creates a Povray file.
# create povray script with correct image parameters
cat <<EOF > tmp.pov
// Equirectangular Panorama Render
// bare bones script
The Povray configuration file is covered in this documentation.
The main section of the documentation is below.
camera {
  location <0, 2, -3>
  look_at  <0, 1,  2>
}
The camera statement describes where and how the camera sees the scene. It gives x-, y- and z-coordinates. location <0,2,-3> places the camera up two units and back three units from the center of the ray-tracing universe which is at <0,0,0>. By default +z is into the screen and -z is back out of the screen.
look_at <0,1,2> rotates the camera to point at the coordinates <0,1,2>. A point 1 unit up from the origin and 2 units away from the origin. This makes it 5 units in front of and 1 unit lower than the camera. The look_at point should be the center of attention of our image.
sphere {
  <0, 1, 2>, 2
  texture {
    pigment { color Yellow }
  }
}
The first vector specifies the center of the sphere. In this example the x coordinate is zero so it is centered left and right. It is also at y=1 or one unit up from the origin. The z coordinate is 2 which is five units in front of the camera, which is at z=-3. After the center vector is a comma followed by the radius which in this case is two units. Since the radius is half the width of a sphere, the sphere is four units wide.
9. Distribute 360 Application
In addition to social media networks like Facebook, Google Street View, there are a number of tools, frameworks and platforms to share THETA images and video.
I’ll divide the application into three categories:
-
WebVR (Experimental)
-
Unity
-
JavaScript libraries
9.1. WebVR
WebVR is an experimental specification for JavaScript APIs. For a status update on WebVR, go to webvr.info
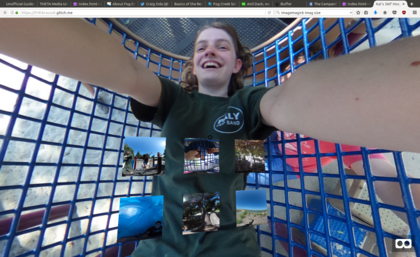
9.1.1. aframe
A-Frame works on web, mobile, and headsets. It’s one of the leading open source frameworks for WebVR.
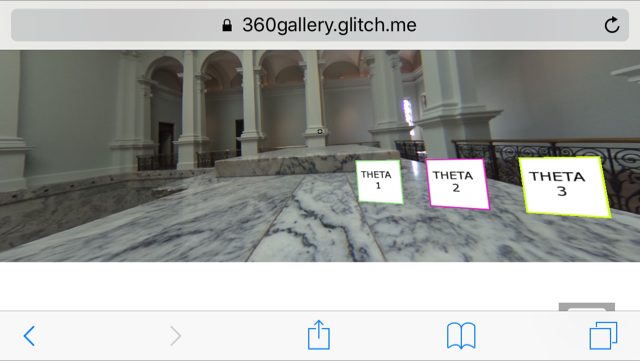
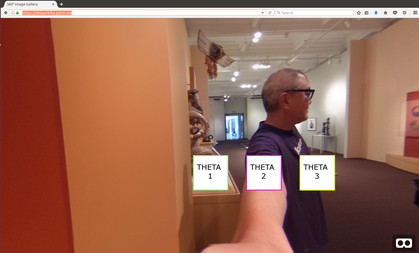
You can test a THETA 360 Image Gallery by pointing your phone in landscape mode to the sample app
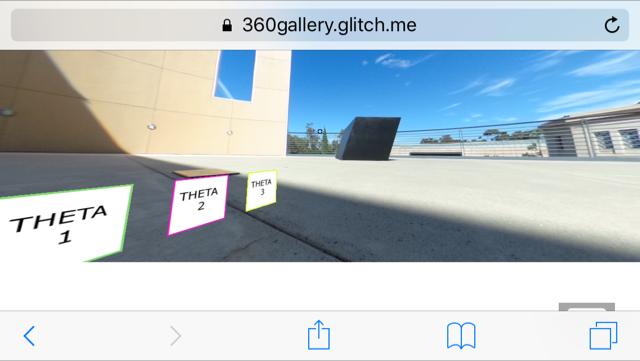
Tutorial to Build A-Frame Application with Glitch
The example uses Glitch, a collaboration platform for coding web applications.
1. Organize 3 Images for gallery
Copy 3 images from your camera to a folder on your computer.
2. Remix Gallery Application on Glitch
Go to Glitch here.
Press Remix to make your own copy of the files.
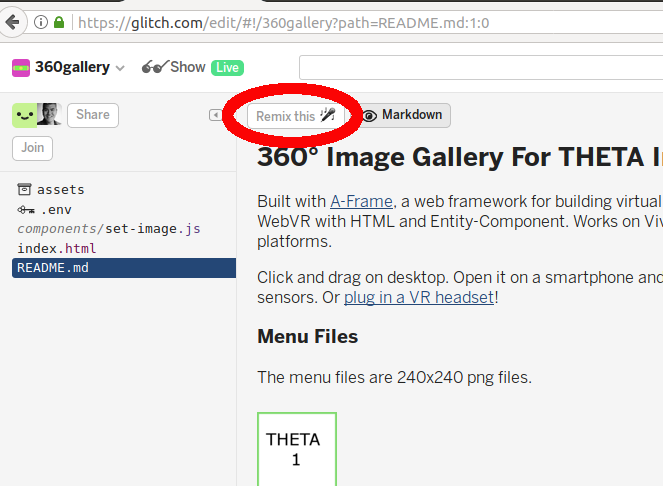
After the remix, your site will have a new name.
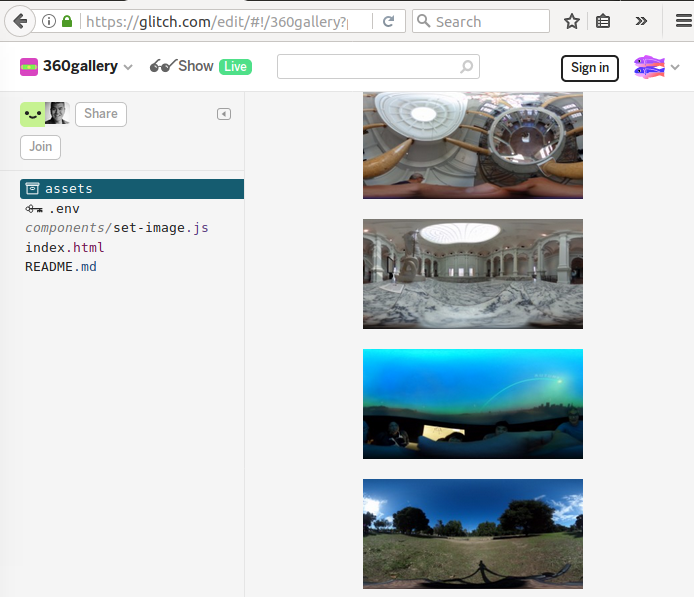
3. Upload THETA Images to Glitch
Under the assets area, drag and drop your THETA images.
4. Click on the image to get the URL
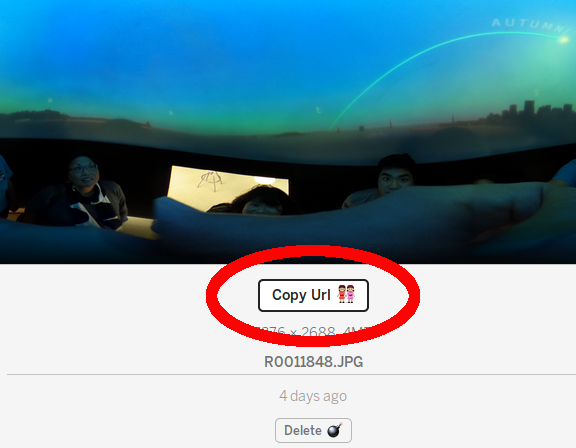
5. Copy URL Into HTML File
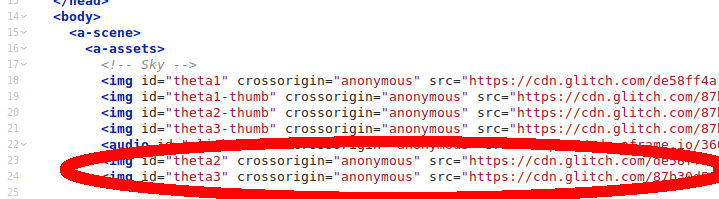
In the HTML, change the src of the first image, line 18.
  <body>
    <a-scene>
      <a-assets>
        <!-- Sky -->
        <img id="theta1" crossorigin="anonymous" src="https://cdn.glitch.com/de58ff4a-64df-46b4-9983-c0172a9bcef0%2FR0011815.JPG?1496785202158">
6. Copy URL for Next 2 Images
Repeat the process above for the next 2 files on lines 23 and 24.
7. View Live Site
Press Show in the upper left corner
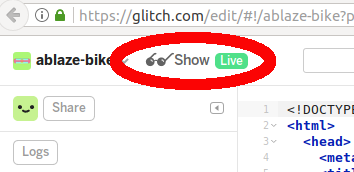
Glitch will open up a new browser.
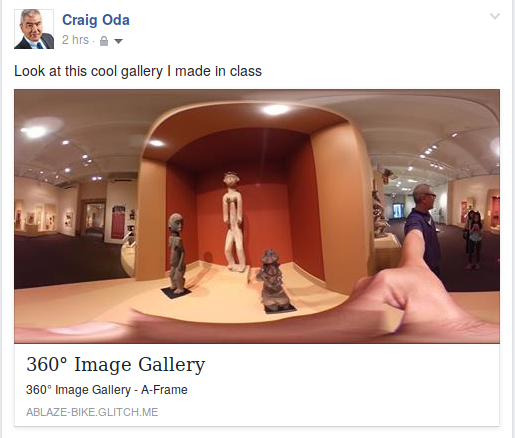
8. Share on Facebook
Grab the link from your browser to share on Facebook.
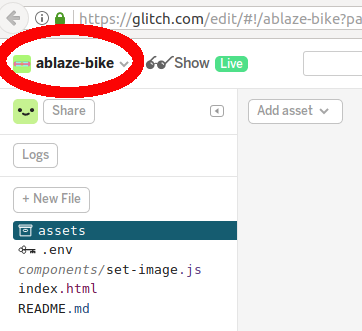
Example: https://ablaze-bike.glitch.me/
9. Modify Code
A good next step is to upload menu pictures. The menus are 240x240 pixel images.
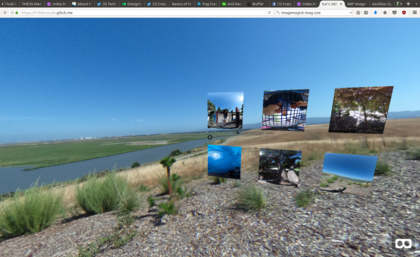
10. Use in Cardboard Put the URL into Google Chrome on your phone and put your phone into Google Cardboard.