THETA USB Live Streaming Now in Full 1080 HD - Free Upgrade
At the end of November, RICOH released free upgrades to the THETA firmware, mobile app, and UVC Blender. The most important upgrade was 1080 full HD live streaming using USB at 30 fps. This increase in resolution from 720 is a game changer for live streaming. Previously, live streaming with USB was limited to 1280x720 at 15fps. It’s a lot clearer now. I confirmed RICOH’s announcement with my own tests showing 1920x1080 at 30fps.
Mobile app updates include:
- interval composite shots
- color temperature specification shots
- register shooting conditions as My Setting
You can upgrade your THETA firmware with the desktop application.
You need to be running firmware version 1.82 or above. This discussion thread covers upgrading your firmware.
Official RICOH Announcements:
- Mobile App and UVC Blender (Nov 24)
- Firmware 01.82 (Nov 24)
Official RICOH UVC Blender (Live Streaming App) and Mobile App Download Site
Ready for more?
Give live streaming to YouTube a try. Instructions are in the live streaming guide
Have more questions?
Here’s a quick QA.
Q: What do I need to stream to YouTube or other video site
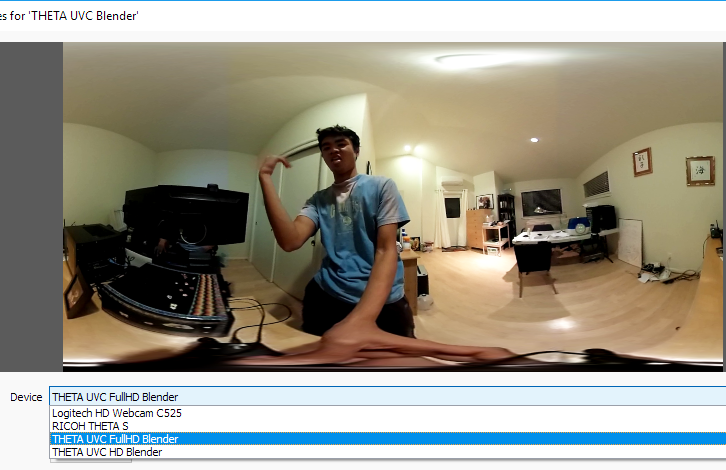
A: You need to install UVC Blender (also called live streaming app) which will convert the USB video stream into equirectangular format. The THETA will appear to your system as a webcam. With UVC Blender installed there will be multiple THETA webcams. Select THETA UVC FullHD Blender.
Q: Will UVC Blender work with HDMI?
A: No. You need to use third-party software or hardware solutions. See the live streaming guide for more information.
Q: Can I Stream with WiFi?
A: No. UVC Blender only works with a USB cable. The THETA S only supports streaming over WiFi with live preview which is intended to preview a scene before you take a still image. The live preview mode is 640x320 at 10fps. The output is equirectangular.
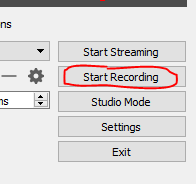
Q: Can I save the output of UVC Blender to a file to get around the storage limitations of the THETA?
A: Yes. Free software like OBS can save the output of UVC Blender to a file.
The file will be in equirectangular format.

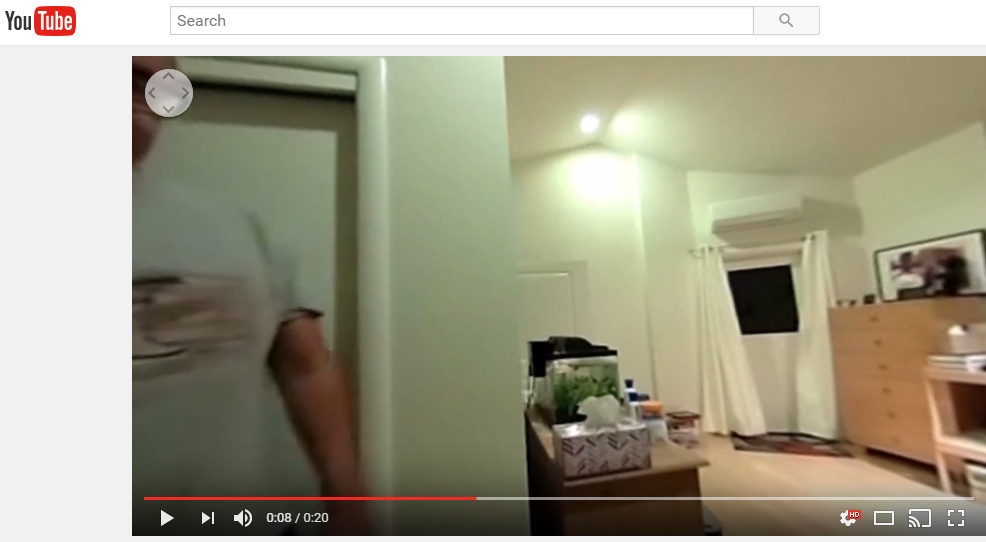
You can load the file directly up to YouTube. Sample video. When I first loaded the video up, it did not have the navigation icon. After I let it sit on YouTube for a while, the 360 navigation icon was automatically added.
The next section explains how to edit the file with Premiere Pro VR mode and share it on YouTube 360.
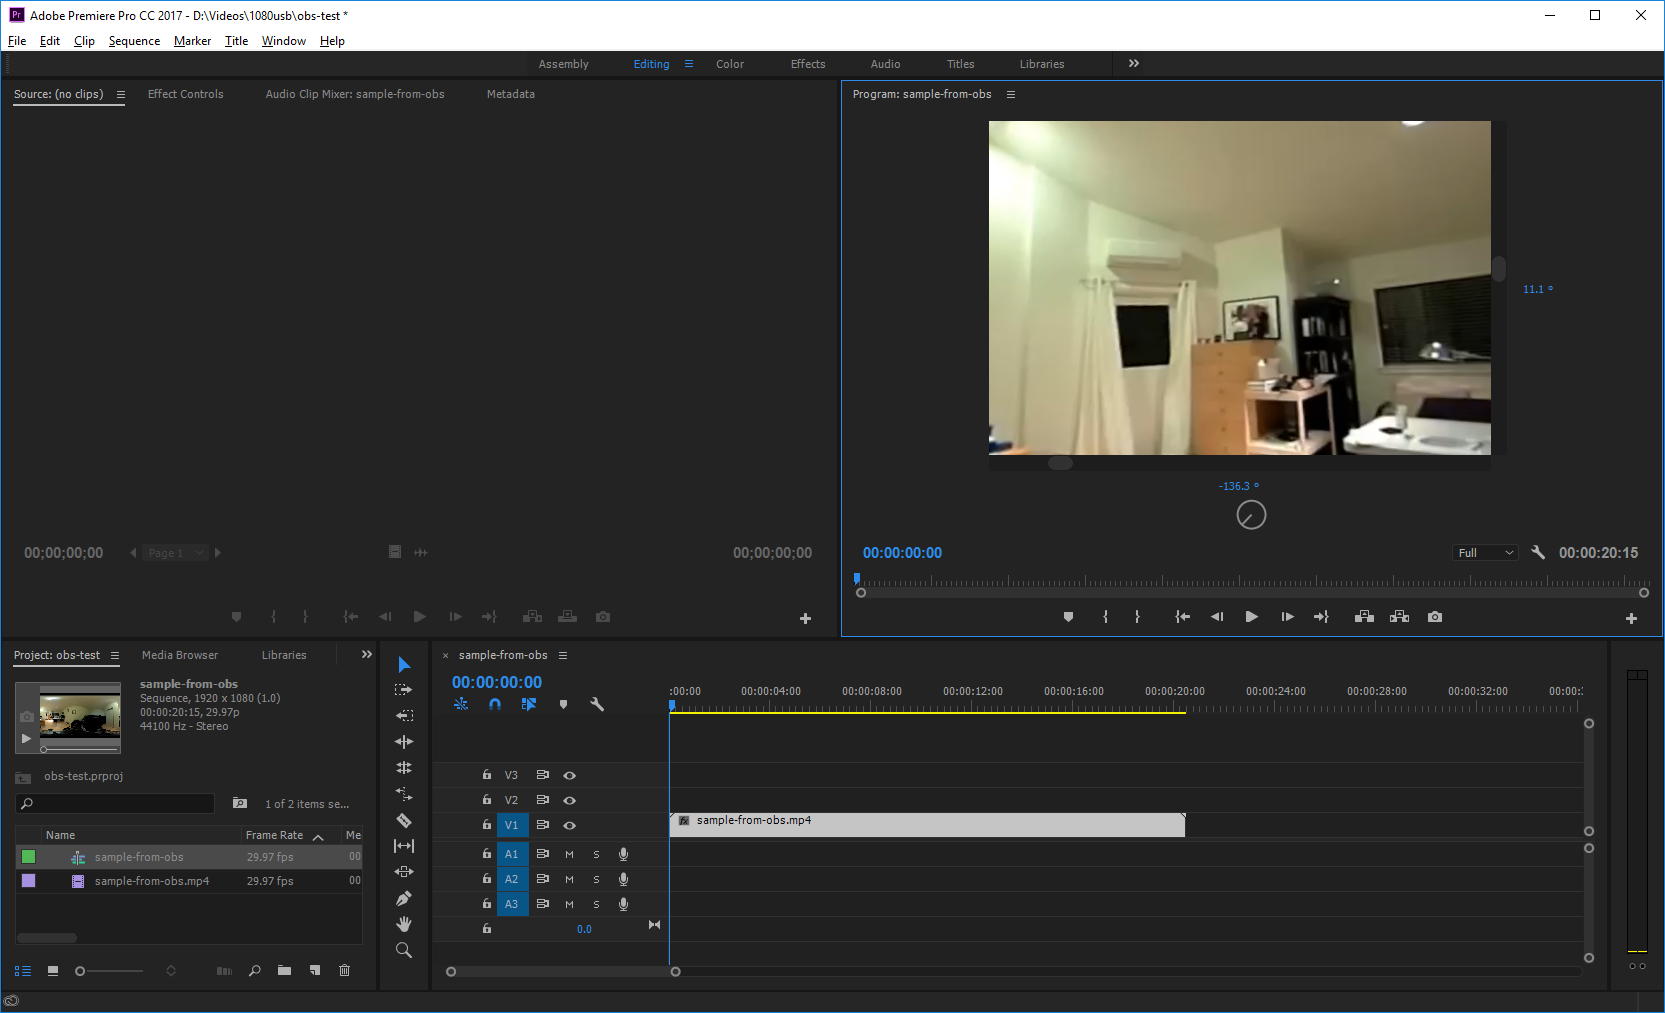
Q: How do I edit the file I saved to disk from UVC Blender with Adobe Premiere Pro VR mode?
A: You can import the clip into Premiere Pro, adjust the VR projection data and then edit it in VR mode.
Right click on the clip. Select Modify -> Interpret Footage.
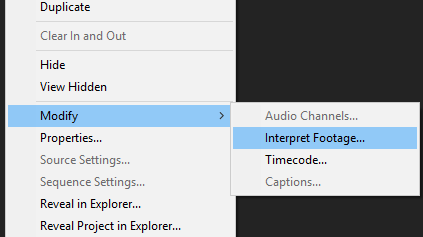
Set the Projection to Equirectangular

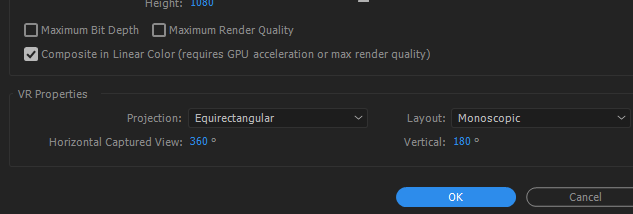
Select your sequence. On the top menu, select Sequence -> Sequence Setting.
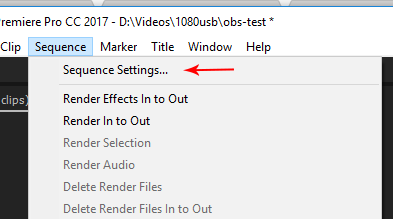
In the VR Properties section, select Projection: Equirectangular.
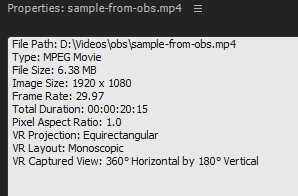
Your clip properties will now look like this.
Right-click on the video, select VR Video -> Enable.
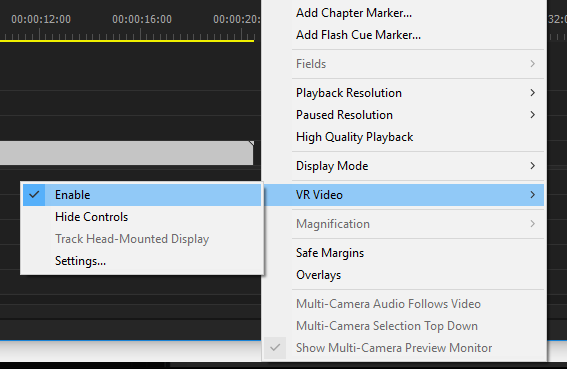
You will now be able to use the VR controls in Premiere Pro and view the video as if you were watching it on YouTube 360 or a headset.
Export the video, inject metadata, then upload to YouTube. You will have 360 navigation in a headset or browser.
Q: How can I view the saved 360 files on my desktop?
A: many desktop software can view 360 videos. For example, I used the open source vlc 3.0 to view the files I saved from THETA UVC FullHD Blender. I needed to inject the metadata
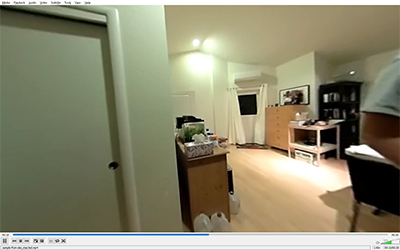
Here’s a screenshot of the THETA UVC FullHD Blender file playing in VLC media player 3.0.0. Navigation works in 360.
Make sure you’re using the VLC version 3.0.0 or above.
